|
The Avast antivirus is a free, powerful, and easy to use antivirus software that protects your PC from viruses, malware, ransomware, and other threats. It also offers security for smartphones and tablets. Avast Antivirus offers a variety of features to protect you from cyber-threats including: virus protection (including ransomware protection), web protection (including adware protection), email protection (including spam filtering), mobile device protection (including anti-theft software). Here we provide the right information Avast Antivirus is not open after the update
Ways to Fix Avast Antivirus Not RespondingAvast-Antivirus is not responding after download then don’t worry about that because it is a very common problem. It’s not so confused you just need to follow some steps and try to get rid it of. Here are some tips to get rid of it from this Avast-Antivirus issue:
If you apply all steps which are given above for resolve the Avast-Antivirus issue What to Do When Avast Doesn’t Open on Windows 10There are many reasons why Avast doesn't open on Windows 10. The most common one is that your antivirus software is not compatible with the new operating system. Avast doesn't open on Windows 10 because of: ●You need to update your antivirus software to a version that is compatible with Windows 10. ●You have an outdated version of the antivirus software, which needs to be updated. ●Your computer has malware installed, which prevents the Avast program from opening. ●Your computer has been infected by a virus, which prevents the Avast program from opening. Update Avast and Your Computer Operating SystemIf you are using Avast Antivirus and you have recently upgraded to Windows 10, you might find that your Avast doesn’t open on Windows 10. This is because of the default settings in Windows 10. In order to fix this issue, you need to change some of the settings in your computer. Step 1: Go to Settings > System > Default Apps > Choose Default Apps by App and then scroll down until you see "Choose an app" and click on it. Step 2: Scroll down until you see ‘Avast Free Antivirus’, select it and click ‘Set as default’ Step 3: Now try opening Avast again and it should work!  Repair the Avast Antivirus SoftwareStep 1: Download the installation file from https://www.avast.com/en-us/software/antivirus Step 2: Install the software and restart your PC Step 3: Run the Avast Antivirus setup wizard Step 4: Select what you want to install and click next Step 5: Review the installation settings and click install Step 6: You will be prompted to restart your PC once more After your PC has finished installing Avast Antivirus, you are ready to go! Restart Avast Antivirus Services: 1. Click on the Windows icon and type “services.msc” into the search bar. 2. Right-click on the Avast Business Security Services and click on Restart Service. 3. Restart your computer to complete the process 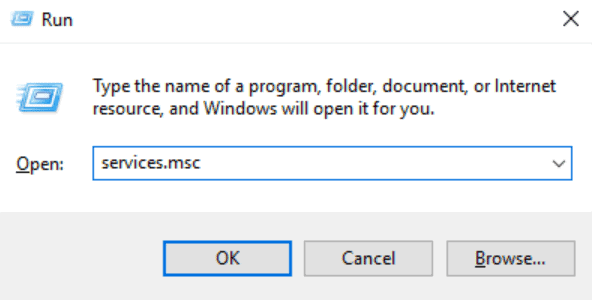 Try a Clean Installation If you are facing this problem Avast antivirus installation, then performing a fresh installation will surely solve the problem. Follow the given step to solve the problem. Step 1: Go to the Avast website and download the latest version of Avast. Step 2: Next go to the Control Panel and find the Avast and click repair and then click next a pop-up window will appear, click on the Confirm tab. Step 3: Next go to the Uninstall section and download the Avast Clean uninstall utility and carefully save it on your computer. Step 4: Now, that both the downloads are completed, switch off your internet router and boot into Safe Mode Step 5: Next, press the Windows Key + R >> open the Run dialogue box Step 6: Next, type in 'msconfig' and press the OK button to open your System Configuration 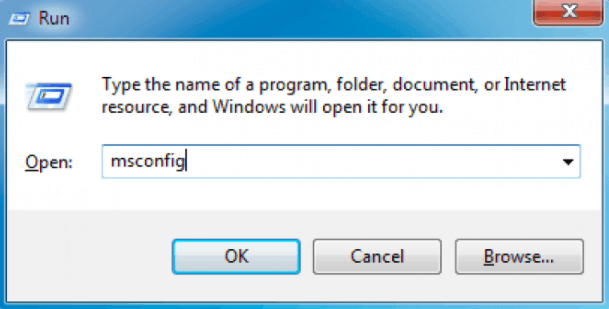 Step 7: Next go to the boot section and click the check box >> Safe Mode >> Click OK 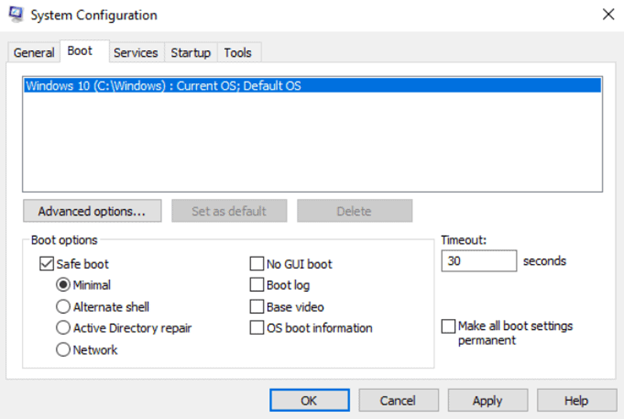 Step 8: Now you are required to restart your computer in order to boot into Safe Mode Step 9: Run Avast Uninstall Utility and browse the folder well where you have installed Avast Step 10: Hit the Remove tab finally and restart your computer in the normal startup option. These steps solved fix Avast won’t open the problem. So, you can try the next method. Update your Avast Antivirus ApplicationThe following is a step-by-step guide to updating your Avast Antivirus software. 1. Select the "Settings" tab on the left side of the screen. 2. Click on "Updates" in the row of icons at the top of your screen. 3. Click on "Update now." 4. The Avast Antivirus update should download and install automatically, but you can also click on "Install now" to manually install it if it does not do so automatically for some reason. 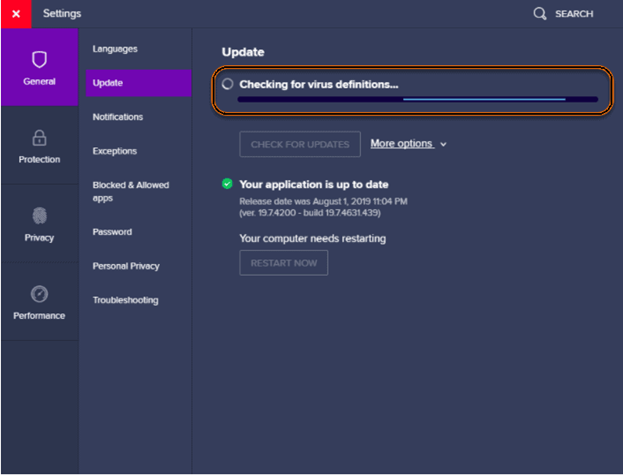 Updation has been done, open the Avast Application. Your problem has been solved. Solve Avast Causes Black Screen in Windows 10Avast is a free antivirus program that has been trusted for years by millions of people. However, for some users, it causes a black screen in Windows 10. The problem is usually caused by the Avast’s compatibility with Windows 10. The solution to this problem is to change the Avast’s compatibility with Windows 10. Users can disable the compatibility mode of Avast and then try to run it again. If they still face the same issue, they should try installing an older version of Avast or uninstall it completely and then reinstall it again after changing its compatibility mode to Windows 8.1 or 7. Step 1: Download and install Avast Antivirus from the official website.
Step 2: Click on "Scan" to start scanning your system for any virus, malware, or spyware. Step 3: Click on "Fix Now" to remove any threats found. Now your Avast antivirus Application will open and run without any problem. So, you already know how to fix Avast won't open problem. Also, you try these methods and hope your problem is solved
0 Comments
Remote desktop connection software aka remoteconnect is a remote desktop application that allows users to access their computer remotely. It is a very useful tool for people who work in different locations and need access to their computers. Aka.ms/remoteconnect – Solve Minecraft Crossplay PS4, PC, Xbox, Switch (2022)Gamers may use their Microsoft account to play games on a variety of systems, including the PC, Xbox One, PlayStation 4, and Nintendo Switch. Minecraft is a popular game that is appreciated by both children and adults. If you want to play Minecraft, you can quickly connect your account to multiple devices by going to aka.ms/remoteconnect. The website http://aka.ms/remoteconnect is where users go to activate crossplay for Playstation, Xbox, Switch, and PC. To properly attach devices to the Microsoft account, users will need to provide a code. However, switching between devices and corrupt saved data can cause the aka.ms/remoteconnect problem to appear. Sign in with your Microsoft account again to repair the problem, or remove the corrupted Minecraft save files. Find answers to the Mirror remote connect access error for PS4, PC, Xbox, and Switch in this article. What Is Aka.Ms/Remoteconnect and How Does It Work? Aka.Ms is a cloud-based, AI-powered chatbot that helps you manage your customer service interactions. Aka.Ms is a chatbot that will take over your customer service operations. It can answer questions, handle queries, and help with customer retention. It’s not just about answering questions and queries though: Aka.Ms can also automate tasks for you in the background to save you time and improve your efficiency! Why does https://aka.ms/remoteconnect error occur? This article is about the steps to troubleshoot https://aka.ms/remoteconnect error and the possible solutions to this issue. The first step is to check whether the device is connected to the internet or not. If not, then you need to connect it with a network cable. If it's connected with a network cable, then you need to make sure that there are no other devices using that same network connection. If there are no other devices using that same network connection, then you should try restarting your computer and check again if it still gives an error message or not. There are various probable explanations if your Minecraft game normally runs properly but the aka ms remoteconnect suddenly appears. The two most common reasons, however, are as follows: a shady game Because Minecraft has numerous versions and may be played on a variety of platforms, it's possible that your game's data are corrupted. Corrupted files might occur as a result of a lost internet connection during an upgrade or installation. Other forms of connection and server failures can be caused by unreliable internet connections. The ms/remoteconnecterror, which is caused by faulty Minecraft game data, can be fixed by reinstalling the game with a solid internet connection. Changing devices If you utilise the CrossPlay feature on several devices frequently, you're more likely to get the aka.ms remoteconnect problem. While switching between devices regularly is the most typical source of the remote error, it doesn't mean you'll always get it. https aka ms remoteconnect Not Working Switch: Can’t login into my Microsoft accountThe website aka.ms/remoteconnect allows people to play Minecraft with other people who have computers. Minecraft can now be played on the PS4 and Nintendo Switch thanks to the aka.ms/remoteconnect website. Users can register and sign in to play in arcade mode with other players on the site using a free Microsoft account if they want to play on a non-Microsoft system. Minecraft users can now play with their pals online thanks to Microsoft. There's a lot more you can do with the https /aka.ms/remoteconnect account, as this post will show you. So let's dig right in and learn more about it. Microsoft no longer wants to sign into the new Minecraft on the Switch.
So, basically, this will reset your game, and you'll be able to connect into your Microsoft account once more. It worked for me the second time, so if it doesn't work the third time, you can repeat the process. I hope I was of assistance! Please let us know if this is of assistance! How to setup aka.ms/remoteconnect on your Xbox one using a smartphone app? This tutorial will show you how to setup aka.ms/remoteconnect on your Xbox one using a smartphone app. 1) Download the Xbox One Smartglass App from the Google Play Store or the Apple App Store and open it on your phone or tablet. 2) Sign in with your Microsoft account and follow the steps to connect your Xbox One console to your device. 3) Select "Settings" in the left column, then select "System" and click on "Remote Connections". 4) Under "Connect via SmartGlass", select "Allow connections from any device". 5) Click on the right arrow to save changes and return to settings menu. Note: This set of instructions is free to use only for smartphone users. What is the best way to set up the Xbox cross-play engine? Step 1: Connect Xbox One console to the same Wi-Fi network as your Windows 10 PC. Step 2: Open the Xbox app on Windows 10 and navigate to the "Settings" tab. Step 3: Select "Add a new device" on the Settings page and follow the instructions to add your console. Step 4: Select your console from the list of devices in Settings, then select "Link Console." Step 5: Select "Linked Console," then select "Xbox Live Gold" under Services and click "Link." Step 6: Once you have completed linking your Xbox One to a Microsoft Account, you will see options for Linking your Controller or Linking an IR Blaster. Step 7: Click on Link Controller, and follow the instructions to link up How to configure aka.ms/remoteconnect on Nintendo Switch or PS4? 1. First and foremost, you must visit a Sony PlayStation store or a Nintendo PlayStation store to purchase PS4 systems. 2. After that, search for Minecraft and select the Minecraft from Switch download option. 3. To download Minecraft for PS4, join the "Minecraft PS4" group and press on the "Minecraft for PS4" button. 4. Follow the steps to register for a Microsoft customer identity. 5. To sign in, go to the Minecraft main menu and tap the sign in button. 6. From the signin tab, tap on the link, and it should direct you to a remote connection. 7. Make sure the eight-digit activation code is correct. 8. Launch the internet browser and navigate to https /aka.ms/remoteconnect. 9. You must enter the code number on the computer screen. 10. Select "Next" from the drop-down menu. 11. After that, you must complete the login procedure by following the on-screen instructions. Delete Minecraft Saved Games100 If you are an avid Minecraft player, you might have saved a lot of games in your PC. However, if you want to delete those saved games, it is not as easy as it seems. You will need to go through the following steps. Step 1: Open the folder containing your Minecraft game files Step 2: Find and delete the folder named "saves" and all its subfolders Step 3: Delete any remaining empty folders with names that start with "saves" Step 4: Empty your recycle bin 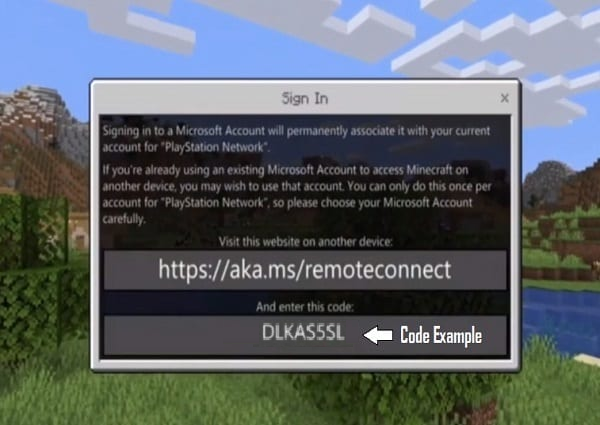 How can I delete the game data that I've saved in https /aka.ms/remoteconnect?Follow the procedures below to erase all corrupted files and the saved game process in aka.ms/remoteconnect: 1. First and foremost, you must begin with Minecraft. 2. First, go to "Settings." 3. After that, select "System settings" from the drop-down menu. 4. Press and hold the storage button. 5. The following step is to go to the Minecraft shop docs and select "Fame storage." 6. Finally, you'll be able to remove all of your Minecraft Saved data. What problems might you encounter if you go to aka.ms/remoteconnect?
How to solve the issues with https //aka.ms/remoteconnect?
How To Fix Google Chrome Sound Not Working In this article, we discuss chrome sound not working and how to solve google chrome sound not working? I have provided the right information sound not working on chrome. Therefore, I have given some best solutions to resolve, sound not working on google chrome. There are many Computer users choose Google Chrome as their primary web browser. So, many users reported that there had been times when this application had failed to play audio. This issue can be frustrating, just when you notice that all your other applications have sound. Normally, the simplest way to solve no sound in Chrome is to restart the web browser along with the entire Windows 10 Computer. So, that fixes do not always good results. You do not the panic solution is very simple. If you want to learn how to solve sound not working on google chrome. Just read and apply the solution. We have put side by side different ways to resolve your audio problems. Therefore, you should try them and test which matches for you. Step 1.Before trying it our solution, you may want to check a few of the obvious culprits why you are not hearing sound your web browser. Here are a few things you should perform first:
 Solution 1: Update your Sound Driver
Sometimes you are facing issues related sound is not working your computer. So, you need to update the sound driver in your device. Thereafter, It is important to have updated and compatible driver version for your Windows 10 computer. You confirm that your applications and hardware will perform smoothly. There are two paths to update your drivers: Automatically and manually using Driver Updater. Previously, you update to manually, you must know that in this process can take more time and effort. You can do it visit the manufacturer’s official website and find the latest version of your driver and check compatibility with your device. If you have installed the not compatible version your device facing more issues. If you want to understand all the details about "chrome sound not working" please visit our website and flow the steps to solve the problem. If you stuck to do this "sound not working on google chrome" please contact Customer Support. A technician available 24/7 available in the help of the customer. In this article, we discuss Lenovo webcam not working There is an unknown problem on a few Lenovo laptops where the webcam does not work. The webcam automatic does not find out by Windows or there is a clear glitch with the device driver. It is an irritating issue that takes a very common problem with Lenovo camera not working but could occur to any laptop. So hare, I show to fix the Lenovo webcam not working, you might well find this problem to helpful solving like issues with other webcam identification. The problem showing stems from a problem with a setting in a few Lenovo laptops that disqualify the webcam for the privacy of the laptop customer. This types of problem can be system form a problem with setting in a few Lenovo laptops that disable the webcam for the privacy of the computer user. Therefore, it is a fine goal that Lenovo has the few steps to protect its laptop customers privacy, a side impact is that it might make the webcam some bit harder to get running properly. If you are lucky, this is wrong with your webcam. In this condition, solving your camera should be fairly easy to solve. If you are not solving, you might have a few updating or modify to do to get your camera to work. Do not worry, I will show you what you required to do to solve some general problems you can run with your Lenovo camera. 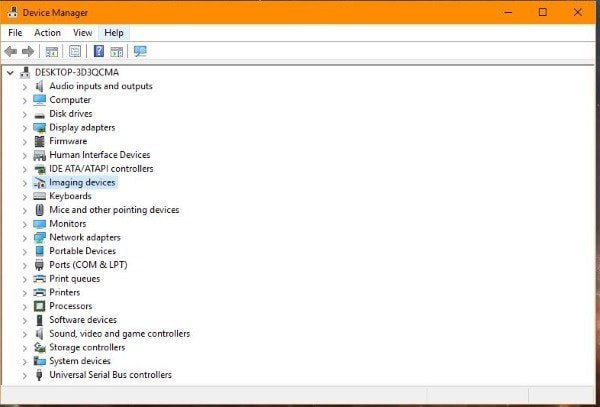 LENOVO CAMERA NOT WORKING: HOW TO SOLVE As you make get it working, then Lenovo camera is very nice. Colour and detail are valid, responsiveness is good, and it will thing in very light conditions. I have a Lenovo Thinkpad and I believe it is a very good device and I use it all the time. First, think Lenovo camera not working is inside the Lenovo application itself. Press the F8 button on your device keyboard. This is the key to disable and enable the Lenovo EasyCamera. If that one not works, try another step to solve the webcam: 1. Type "Lenovo" into the Microsoft Windows Search box and choose Lenovo Setting. 2. Choose Camera and scroll to Privacy Mode. 3. Toggle Turn Privacy Mode Off and On. 4. Retest your Camera.  This privacy setting is designed for your safety. It is less simple to hack someone's camera if you might get into the device, and there have been great incidences of this happening.
When your webcam is compromised, cybercriminals can use the webcam to spy on you, or further use the webcam to reason other sorts of issues, such as receiving you in a DDoS invasion. Therefore it was not Lenovo webcam that was involved, 2016 DDoS attack that nearly brought down the net was carry by a malware application that enlisted a zombie army of webcams all sending to goal the same time. If you want to know all the details about "Lenovo webcam not working" please visit our website and flow the steps to solve the problem. If you stuck to do this "Lenovo camera not working" please contact Customer Support. A technician available 24/7 available in the help of the customer. |
 RSS Feed
